

Date: 10/2024
Version: 1.24
© Turck Vilant Systems Oy
2.1 Turck Service Tool / How to find IP Address of the Device
2.5 Engine installation package
2.6 Passthrough engine for TVS Client installations
3 Update Q300/Q180 to latest radio firmware version (RADIO FIRMWARE)
4.1 Login to SSH linux console
4.3 Removing engine installation
4.5 Q180/300 Update Firmeware error
4.6 DNS Setting, manually using console
4.7 How to install engine without reader web user interface
5 Impinj R700 and R510 Series Devices
5.3 Access Reader web ui using browser and reader ip address
5.4 Configure network interface, NTP and DNS
5.6 Install cap file using web interface
5.7 Reboot reader after installation is completed
6 Impinj Speedway Devices (R220,R420)
6.2 Software or Firmware update
6.3 Removing Engine (custom application)
7 Zebra Devices (Fixed readers, FX9600 etc)
8 Basic Engine configuration and taking into use
8.2 Engine TAGFILTER example for direction gates
Selecting correct installation package is done by selecting based on the file naming and file type.
Packages intended to be used with Device Manager: .tvszip . Example:
vilant_engine_DM_3.XX.YY.ZZZZZZ.tvszip (where XX.YY.ZZZZZZ is the version numbering)
With older Impinj R420 and R220 devices equipped with HW version 4, a separate smaller installation package containing term “_oldimpinj_” must be used. Example:
vilant_engine_DM_oldimpinj_3.XX.YY.ZZZZZZ.tvszip
When the engine is installed directly to the device using web user interface, a device specific package must be used. Package file name contains device specific naming.
Turck Q300 and Q180 readers:
vilant_engine_turck (such as vilant_engine_turck_3.XX.YY.ZZZZZZZZ-basic.raucb)
Turck reader package are always of file type .raucb
Using passthrough version (for client use), it is recommended to use package with passthru naming such as vilant_engine_turck_3. XX.YY.ZZZZZZZZ-q180q300-passthru.raucb
Impinj R420 and R220 readers
HW Version 5 and newer:
vilant_engine_impinj (such as vilant_engine_impinj_3. XX.YY.ZZZZZZZZ-basic.cap)
Impinj readers file type is .cap
HW Version 4:
vilant_engine_oldimpinj (such as vilant_engine_oldimpinj_3. XX.YY.ZZZZZZZZ-basic.cap)
Impinj readers file type is .cap
Impinj R700 and R510 readers:
vilant_engine_r700 (such as vilant_engine_r700_3. XX.YY.ZZZZZZZZ-basic.cap)
Impinj readers file type is .cap
Download Turck Service tool from
https://www.turck.de/en/product/0000001a000293cb0002003a
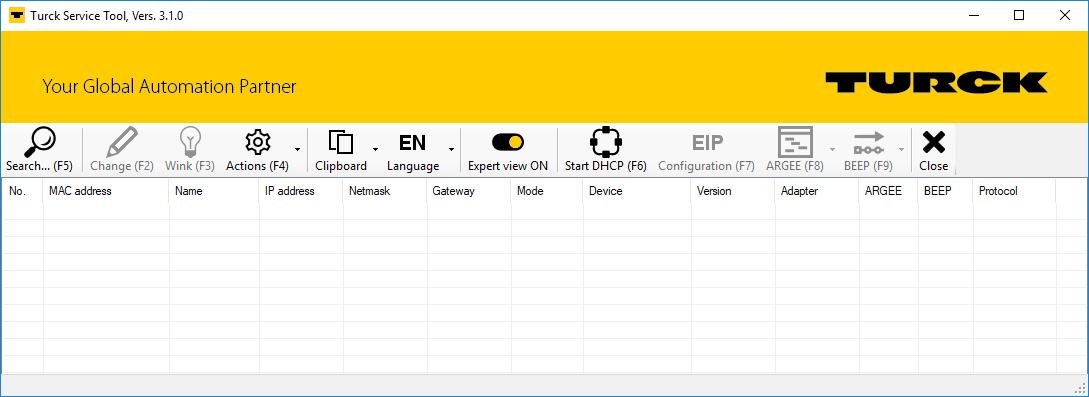
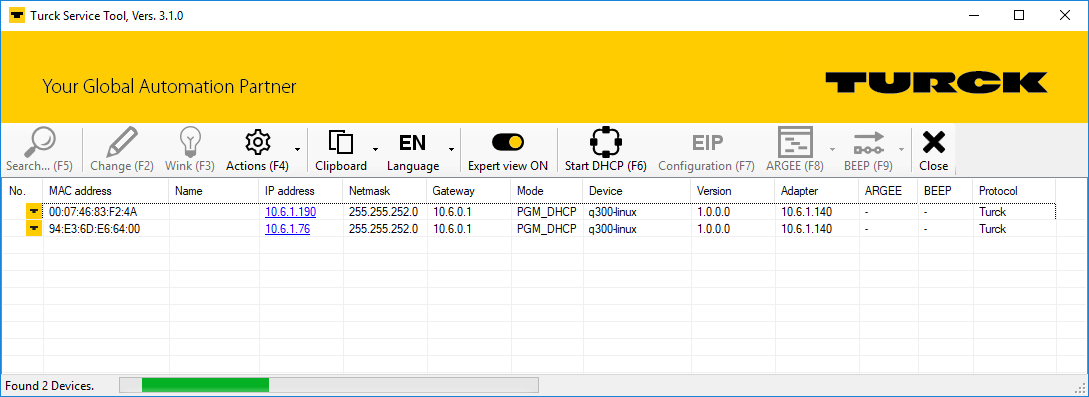
Open Service Tool and use it to find reader ip address.
The default password for the web interface is: password
Open your browser and type in your reader’s ip address.
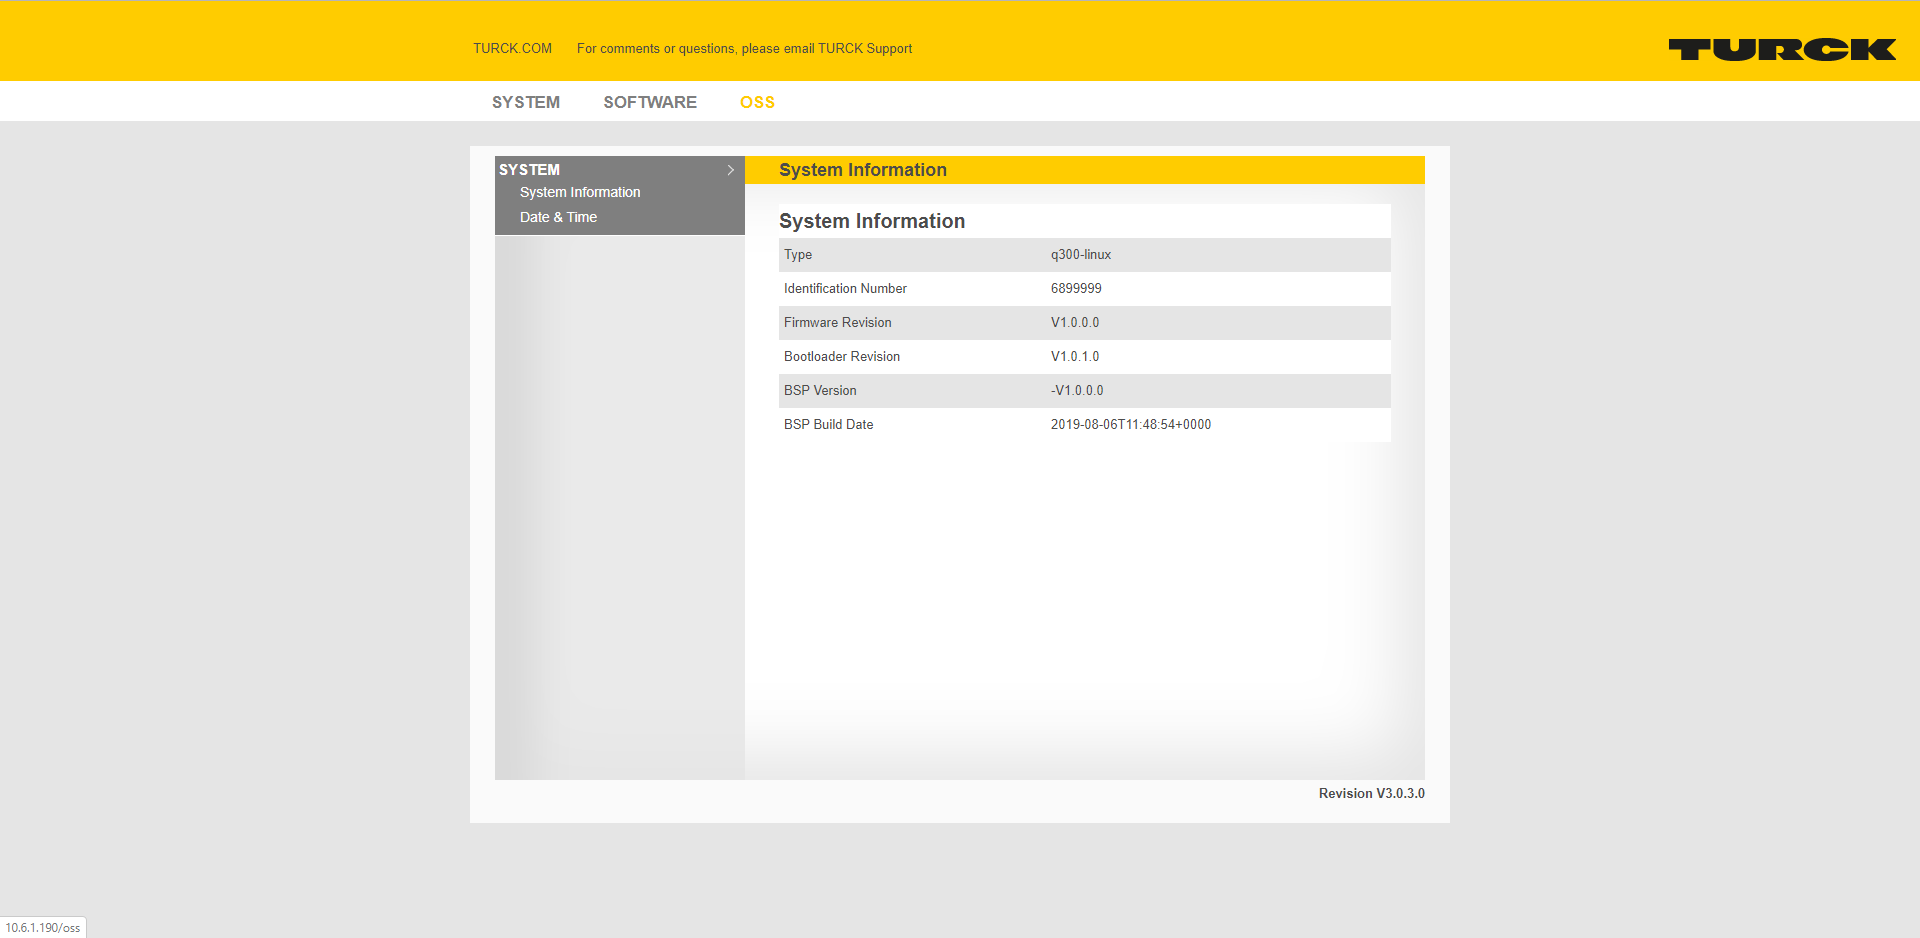
In case of older readers with firmware version 1.0
Go to menu selection “SOFTWARE”

In case of newer readers using firmware version 1.1 or later use the Firmware page.
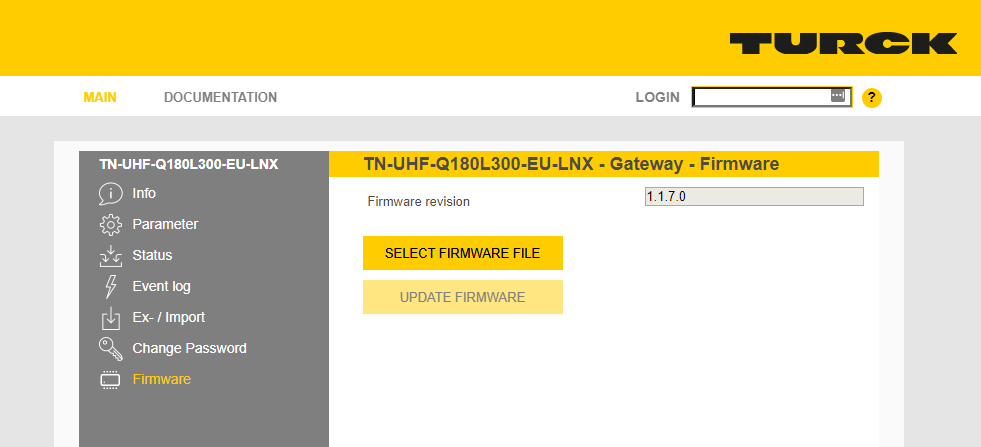
In case there is a newer Linux firmware available for the reader, update the firmware.
Select File and select latest reader firmware installation package, such as 1.1.7.0

Select File and select engine installation package: vilant_engine_turck_xxxx-q300.raucb
In case you want to use TVS Client for Q300, you need to use still engine as passthrough server between UHF reader and Client. In this case you must install engine version
vilant_engine_turck_xxxx-q300-passthru.raucb
In this case the default TCP port for passthrough is 9102 (for Client use). Set that as communication port in TVS Client.
After selecting installation file. Click Upload and when completed click Install.
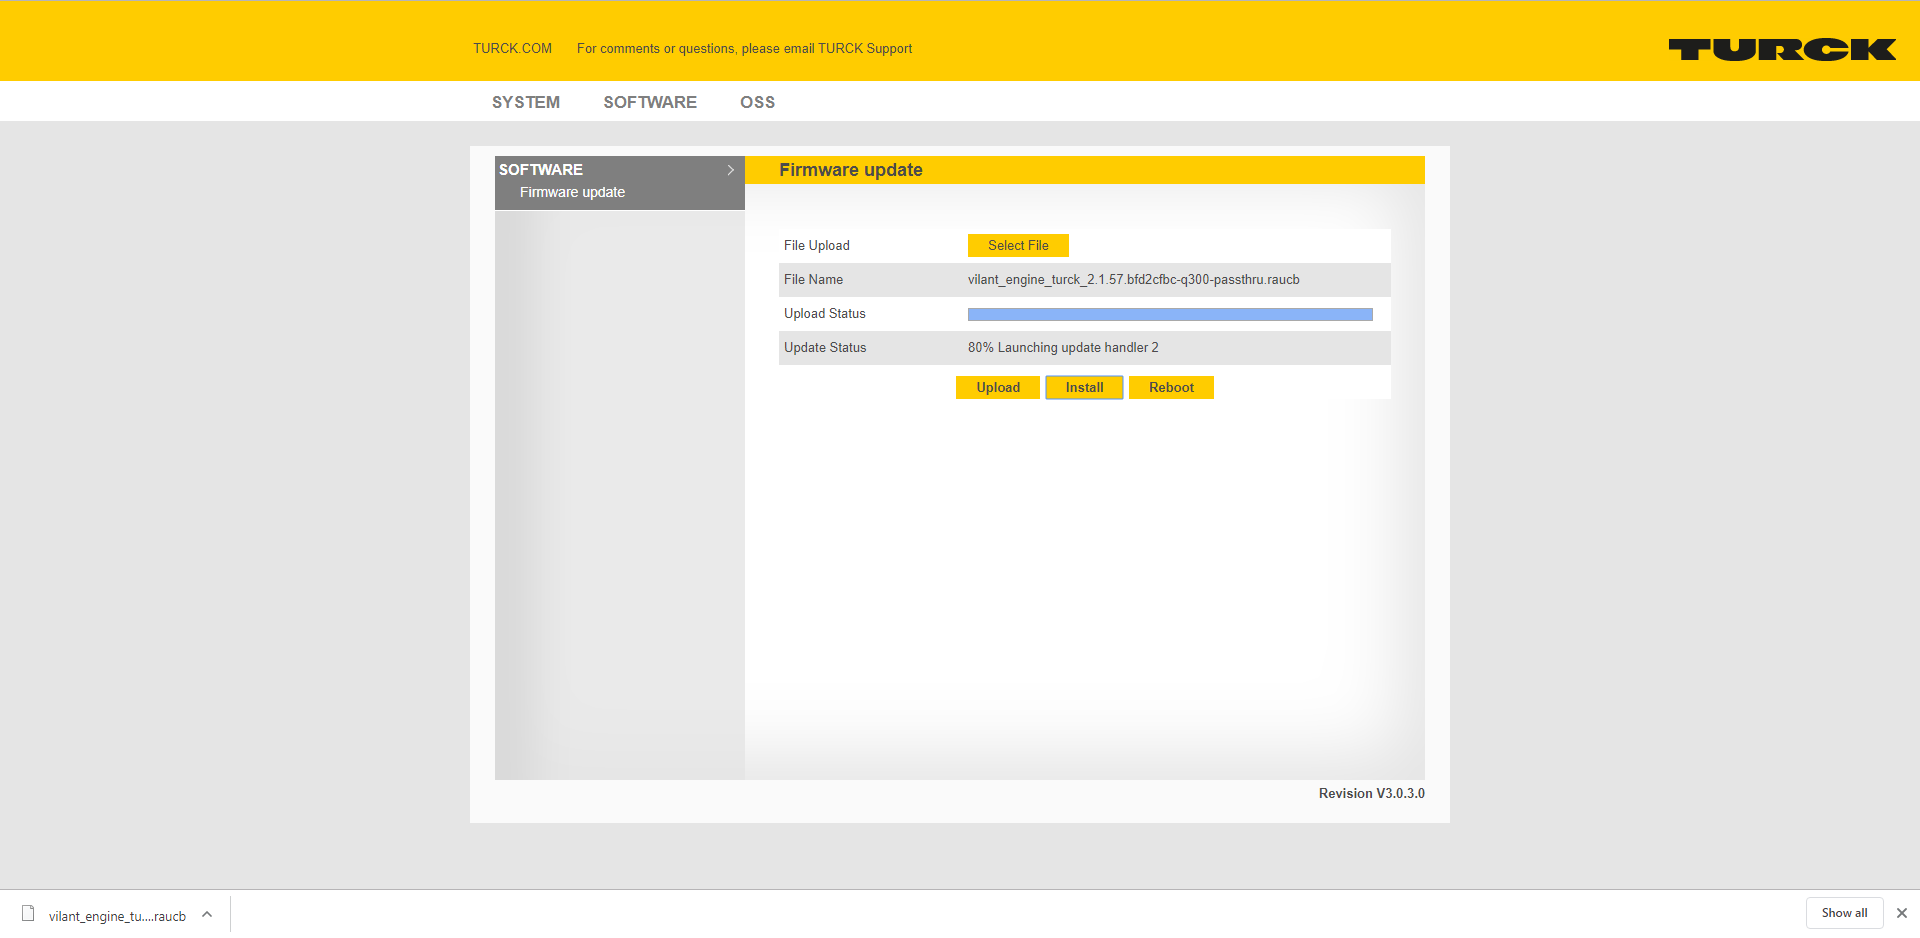
In case earlier version of the engine is already installed, the result in Update Status may show unnecessary error message: Handler error: Child process exited with code 1, however the engine installation is typically still successful and the error can be ignored.
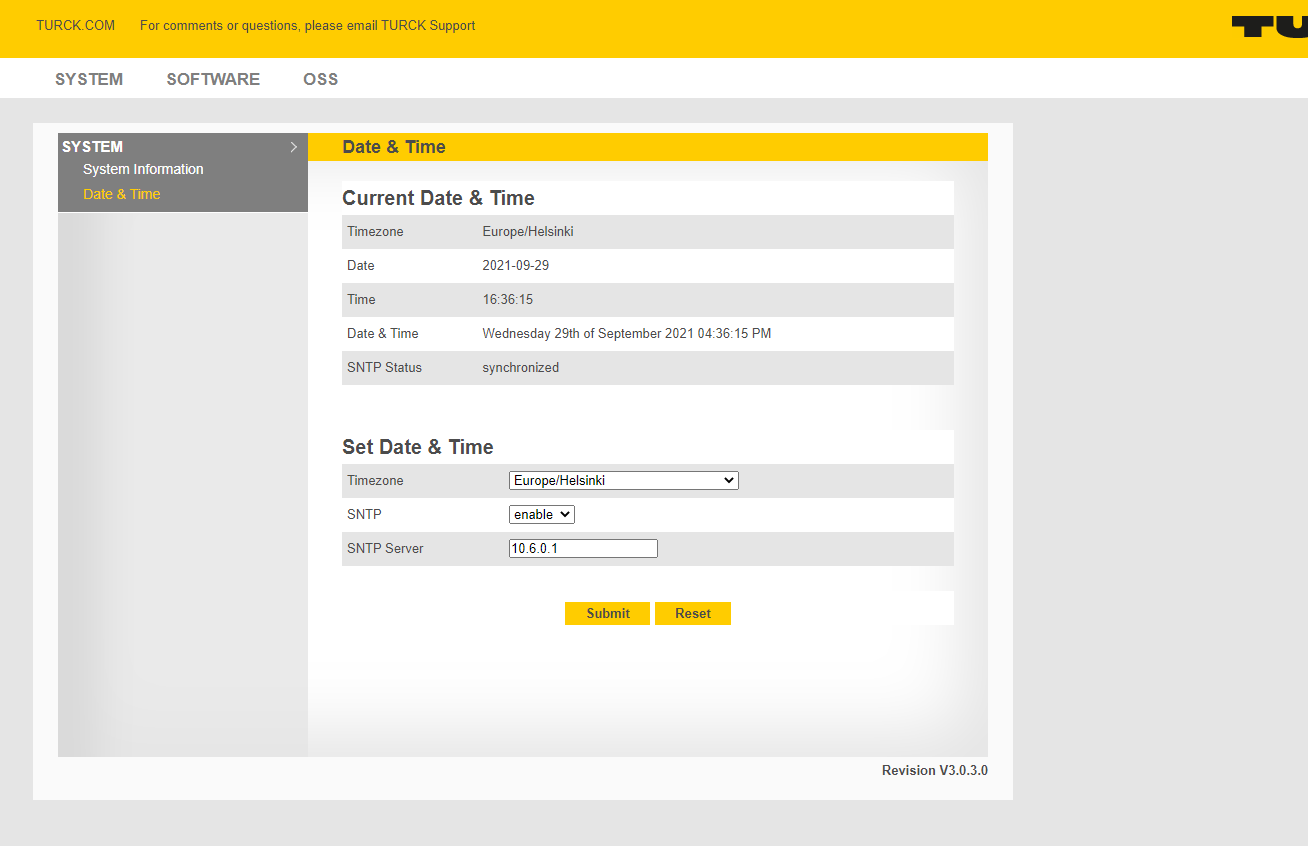
NTP Time server must be set for all readers in order to keep tag read timestamps in correct time.
In Firmware version 1.0 this is done from the readers web ui in port 80. Click SYSTEM -> Date & Time
In the later firmware version 1.1 of the Turck readers, Network settings are done on “Parameter” web page.
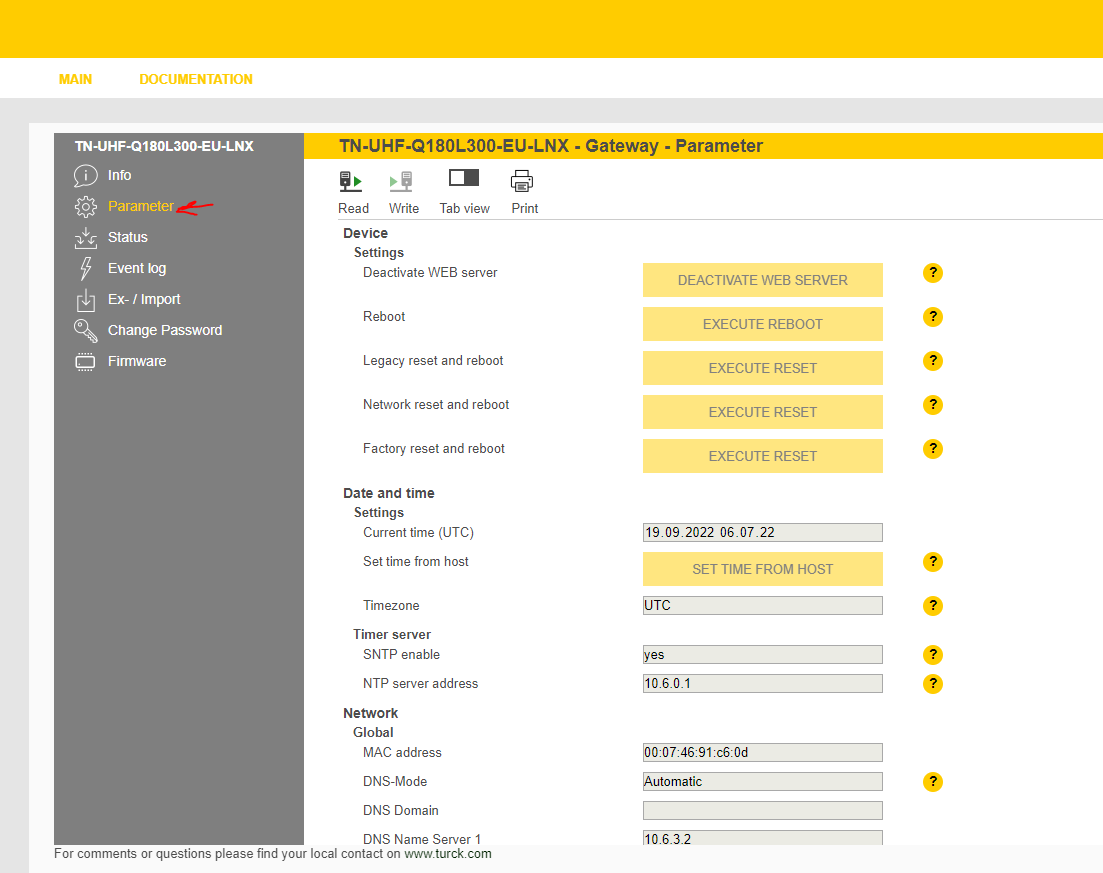
DNS server must be set for all readers to enable using DNS names for servers in configuration.
In Linux firmware version 1.1 this is done using the Parameter web page.
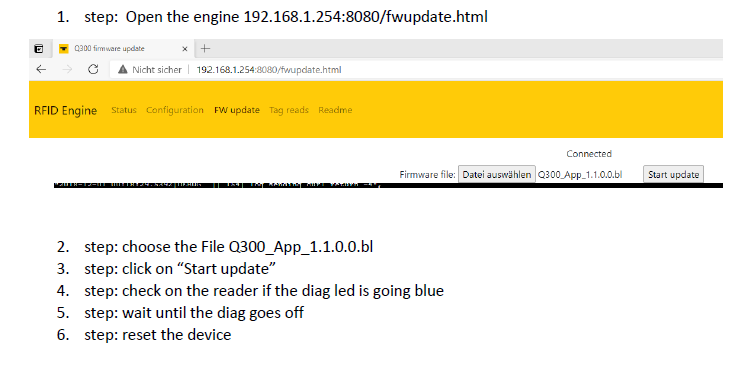
Open engine browser interface in address: http://READER_IP:PORT/fwupdate.html
Default port for engine web ui is 8080 or 8088
If the engine version is newer than 30.0.43, then the radio firmware can be updated using link from engine web ui


Click start update
Check reader diag led going BLUE
Wait until diag led going OFF
Reset the device
This may have to be done, for example if you have an engine version that is not compatible with the new firmware versions.
The downgrade procedure can only be done via ssh.
1.Copy the file to the target
2.Run the `update` command via ssh: `update system $FILE`
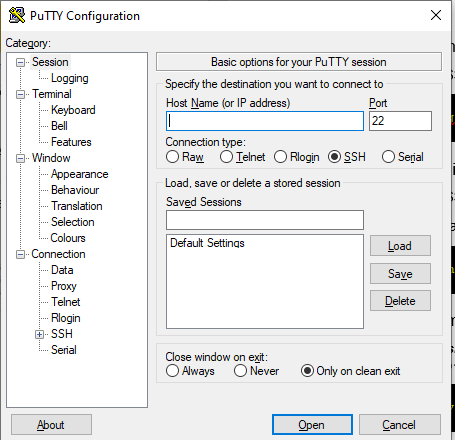
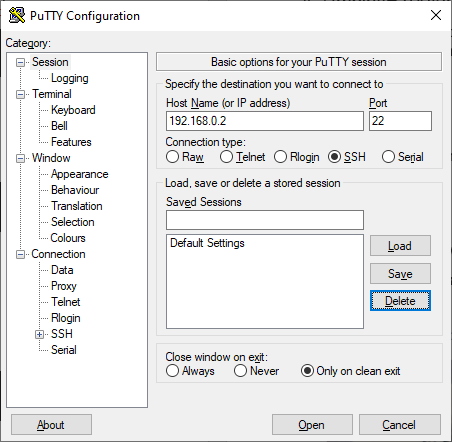
Connect to reader using SSH port 22, for examply by using putty and login with default credentials root/turck.
Login to reader using SSH (root/turck) and give command line command:
| systemctl stop engine |
|---|
Login to reader using SSH (root/turck) and give command line command:
Remove files from /data/custom-application/engine using linux commands, such as
| rm -r /data/custom-application/engine |
|---|
In case of for instance, unknown or forgotten Web UI password, a factory reset of the reader have to be performed. NOTE! A factory reset will delete all data in the reader and it will return to the state it was when it was delivered.
Log in to the reader SSH linux console and perform following commands:
rm /data/storage/Storage.APP*.sqlite3
factoryreset
reboot
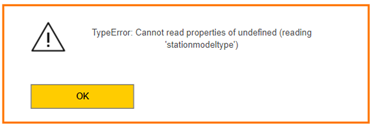
When upgrading to a newerfirmware this error can appear
Login to reader using SSH (root/turck)
To check the device name, give command line command:
echo $(gomcli $((0x00420014)))
If the result is empty or incorrect string, execute the command:
ibtpserver -s DEVICE_NAME TN-UHF-Q300-EU-LNX
Additional:
1. To check device ID - $ echo $(gomcli $((0x00420015)) -t NUM -f hex)
Set device ID: $ ibtpserver -t d -s DEVICE_ID $((0x0150003a))
2. To check device order number- $ echo $(gomcli $((0x00420016)) -t NUM -f dec)
Set device order number: $ ibtpserver -t d -s DEVICE_ORDER_NUMBER 100000897
Please notice that by using latest Linux firmware of the Turck Q180/Q300 reader (version 1.1.7.0 or later) you are able to do DNS settings in the web ui of the reader and this method should not be used.
| vi /etc/systemd/system/engine.service |
|---|
Add just before ExecStart:
ExecStartPre=/data/custom-application/engine/setdns
Save file and exit, then type in console
| vi /data/custom-application/engine/setdns |
|---|
Add the following into the new file
#!/bin/sh
chmod u+w /etc/resolv.conf
echo “nameserver 10.6.3.1” > /etc/resolv.conf
Save file and exit, then type in console
| chmod a+x /data/custom-application/engine/setdns |
|---|
Reboot and test
In case Q180 or Q300 version does not include web user interface, such as with some country versions (Australia etc), the engine can be installed from command line. Here are the steps needed.
Transfer engine installation file to the reader using FTP or SCP. Here the example is done with WINSCP, which is a free tool for windows, available online.
Installation file can be moved for example to the /data/custom-application folder
Login using SSH to the reader (such as using putty terminal or any other SSH terminal) – see above 4.1 Login to SSH linux console
Use command line command
| rauc install vilant_engine_x.x.x.x.rauc |
|---|

Use SSH or serial port (using USB micro to USB A cable in console port of the reader) to access the RShell of the reader (reader ip address, port 22 or baud rate 115200 with serial port),
Default username/password combination is root/impinj (see Impinj manuals for more details)
CAP installation can be enabled with the RShell command “config image cap enable open”
For some firmware versions, this command doesn’t exist and this step can be skipped.
Impinj default IP address is 169.254.1.1. This address must be changed!
In RShell use command:
config network ip dynamic (for DHCP address)
config network ip static <IP> <NETMASK> <GATEWAY> (for static ip address)
In case web page is warning about security, select advanced and proceed to page
Default username/password combination is root/impinj (see Impinj manuals for more details)
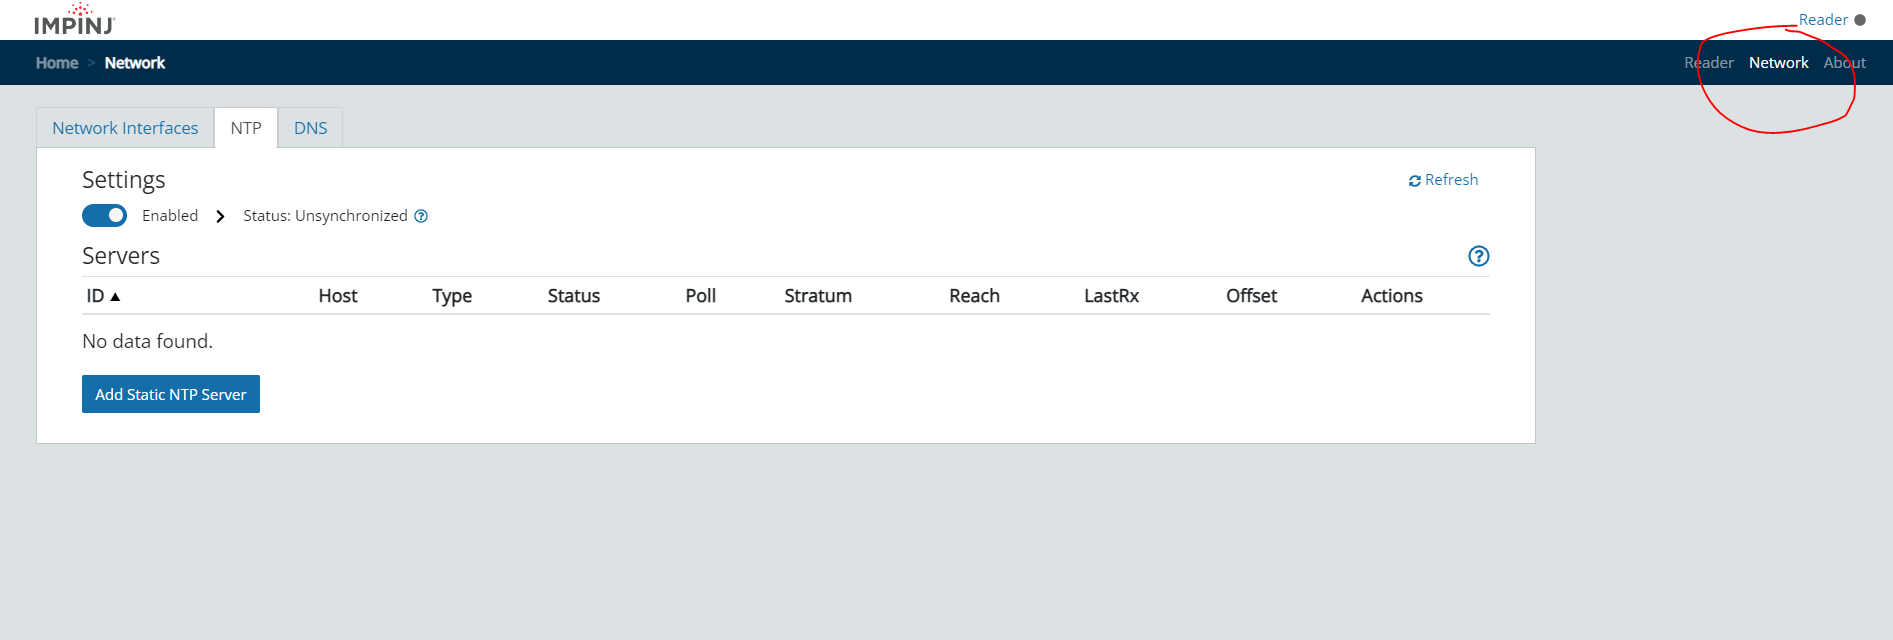
DNS and NTP can be configured from RShell and in some firmware versions from web page.
Cnfiguring from web page:
Using the web page and the “Network” link in the right top corner, configure network interface, NTP server and DNS servers.
Configuring from RShell:
config network ntp disable
config network ntp dynamicservers disable
config network ntp delall
config network ntp add <NTP SERVER ADDRESS>
several ntp addresses can be defined.
config network ntp enable
config network dns add <DNS SERVER ADDRESS>
several DNS addresses can be defined.
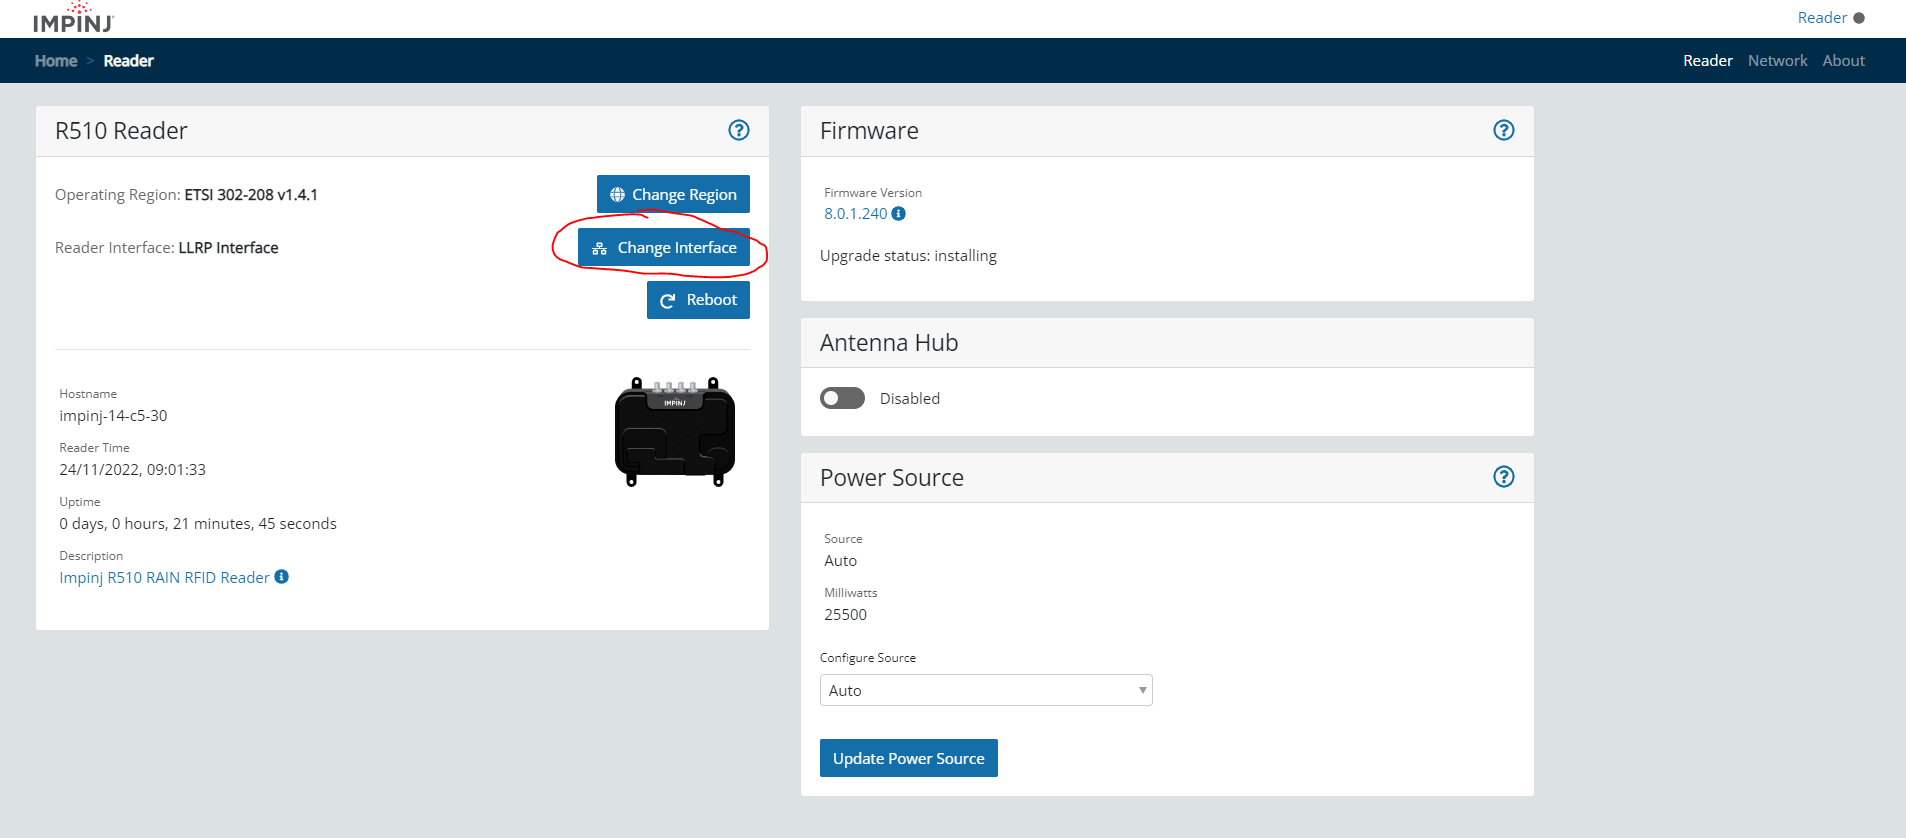
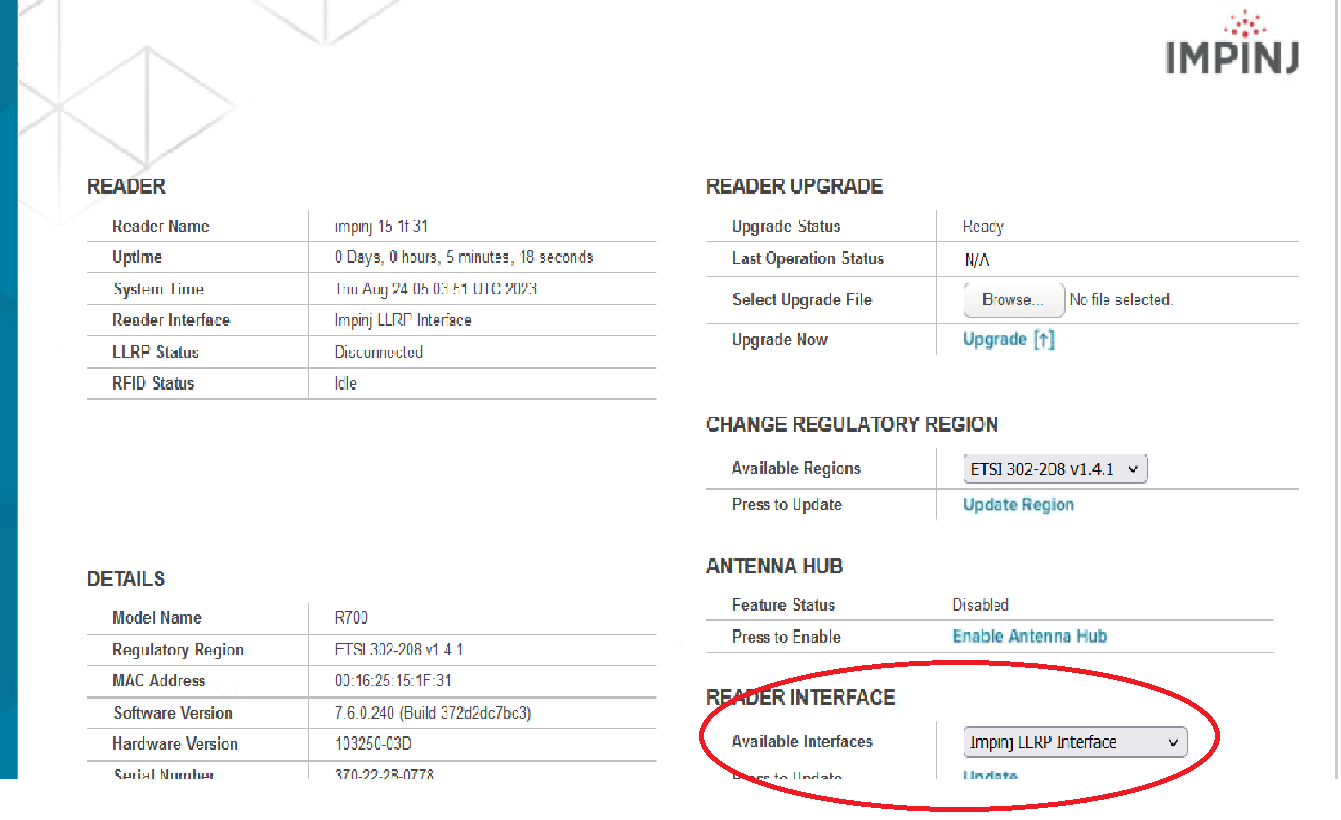
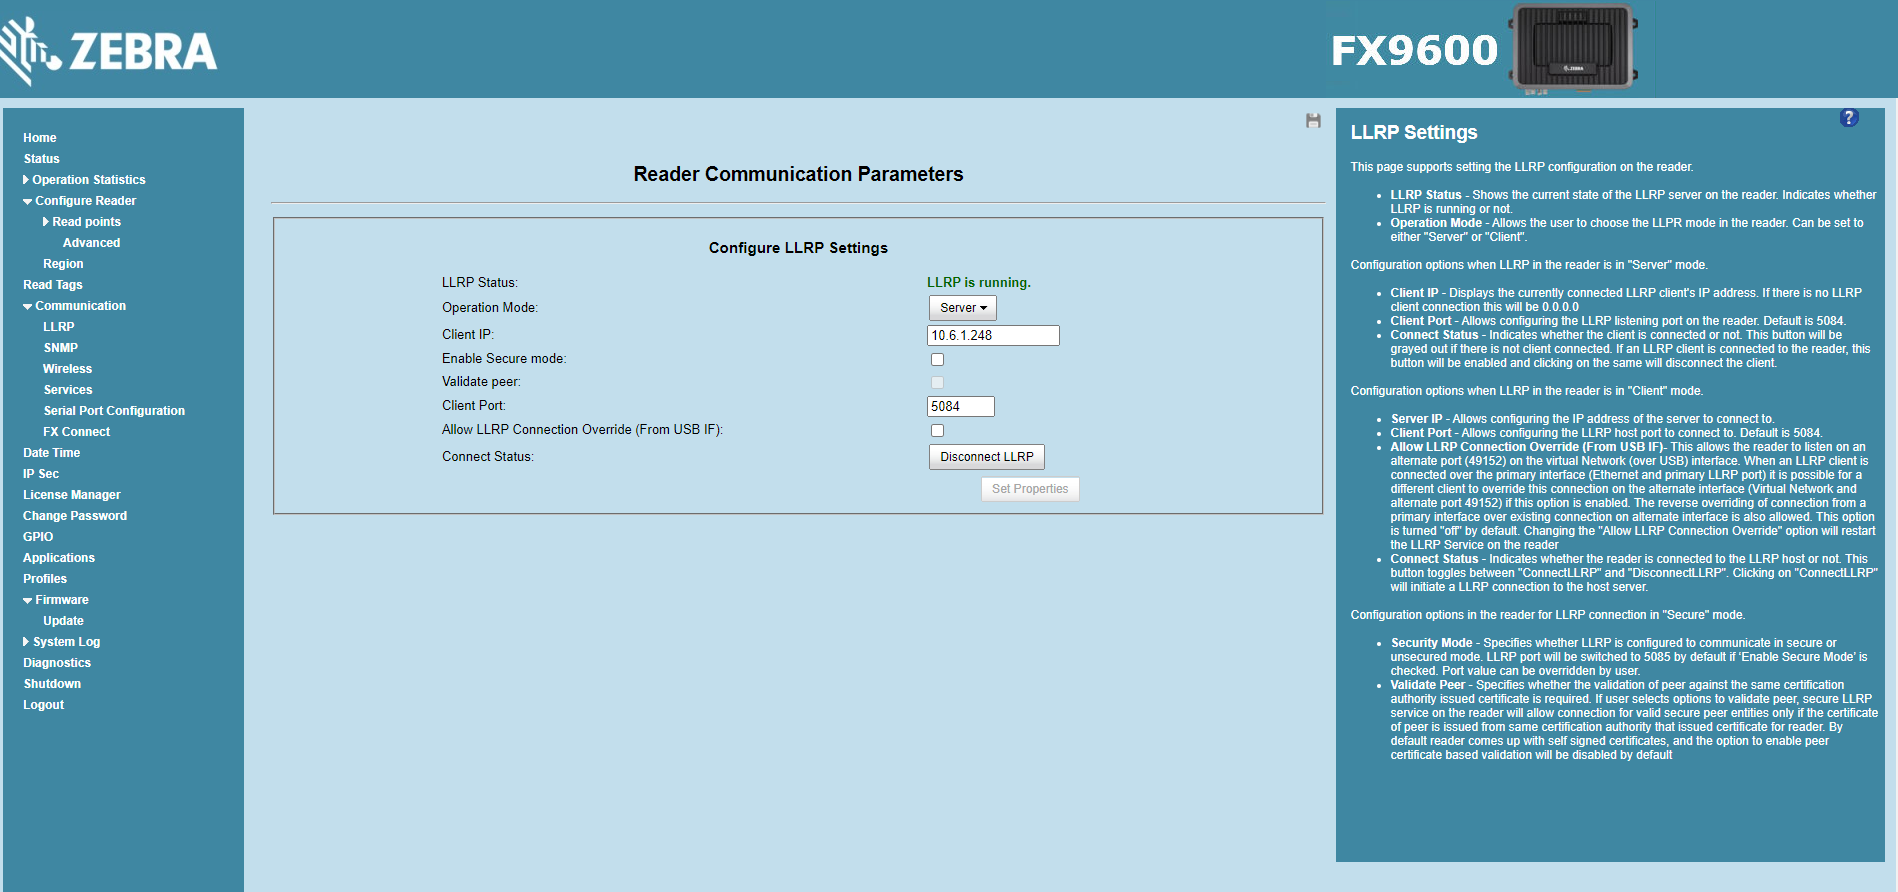
On web page, configure the LLRP Interface to be in use.
This can be done using the “Reader” link in the top right corner of the web page or from “READER INTERFACE” pull down selection, depending on firmware version.
Or
Make sure to use the correct .cap file installation package for TVS engine
After reboot, access the engine WEB UI to configure the engine itself
Please note that engine is running WEB UI in port 8088 with new R510 and R700 devices
NOTE: TVS Engine latest versions (3.0 and newer) are only compatible with Impinj PCBA Version 5 or later.

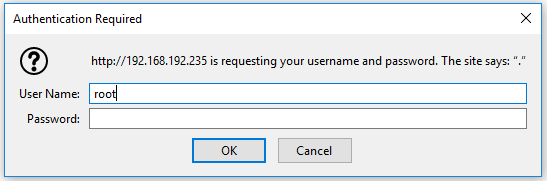
Open browser.Use READER IP ADDRESS, such as 10.6.1.110 in this example in your browser address field.
Username: root
Password: impinj
If Impinj firmware is older than 5.12.3 you need to update a new firmware package using the same method as below. Version 6.0 or later is recommended.
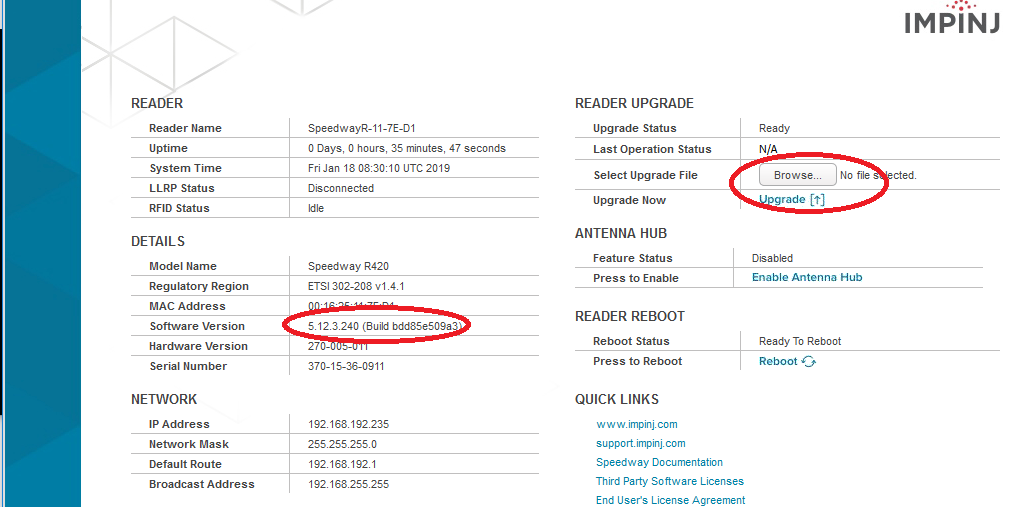
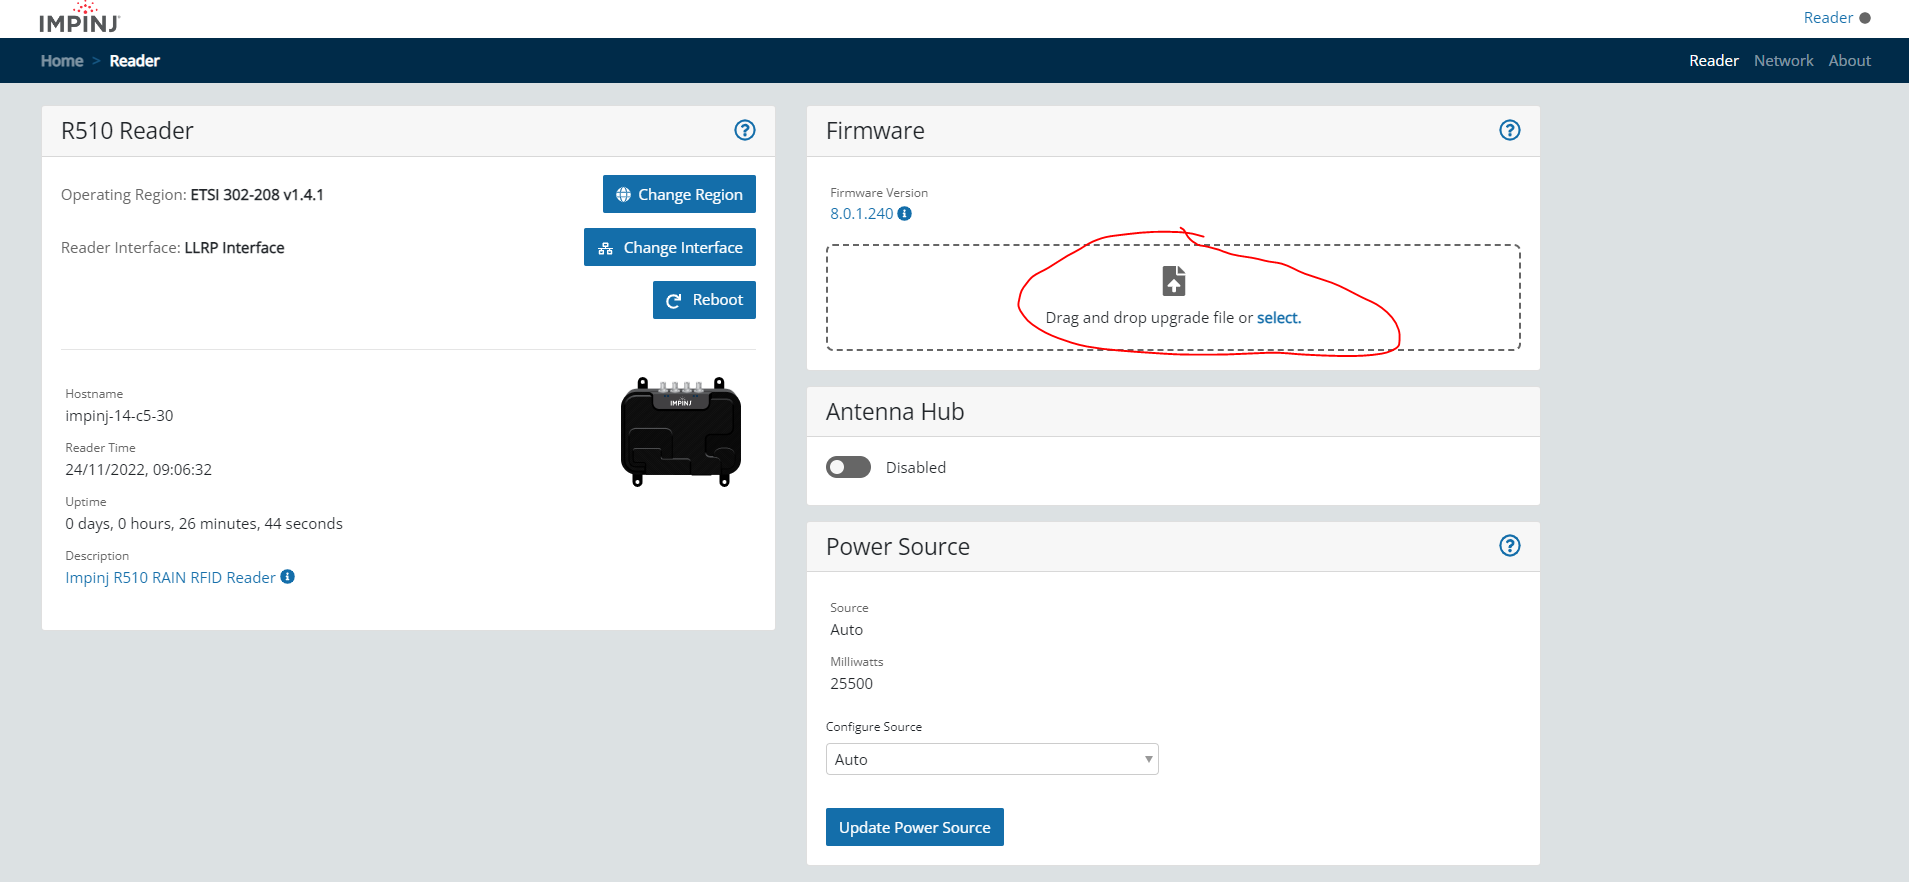
First select Browse and select the installation package (either firmware or TVS engine). TVS Engine file is typically named vilant_engine_impinj_xxxx.cap.
Then select Upgrade and wait until upload and installation is complete.
Reboot and wait until reader has restarted.
If you are using Impinj FW version 8.0 or later please notice that you need to enable cap file installations via RSHELL from ‘config image cap’ menu
. Use command
config image removecap
to remove custom application (=engine).
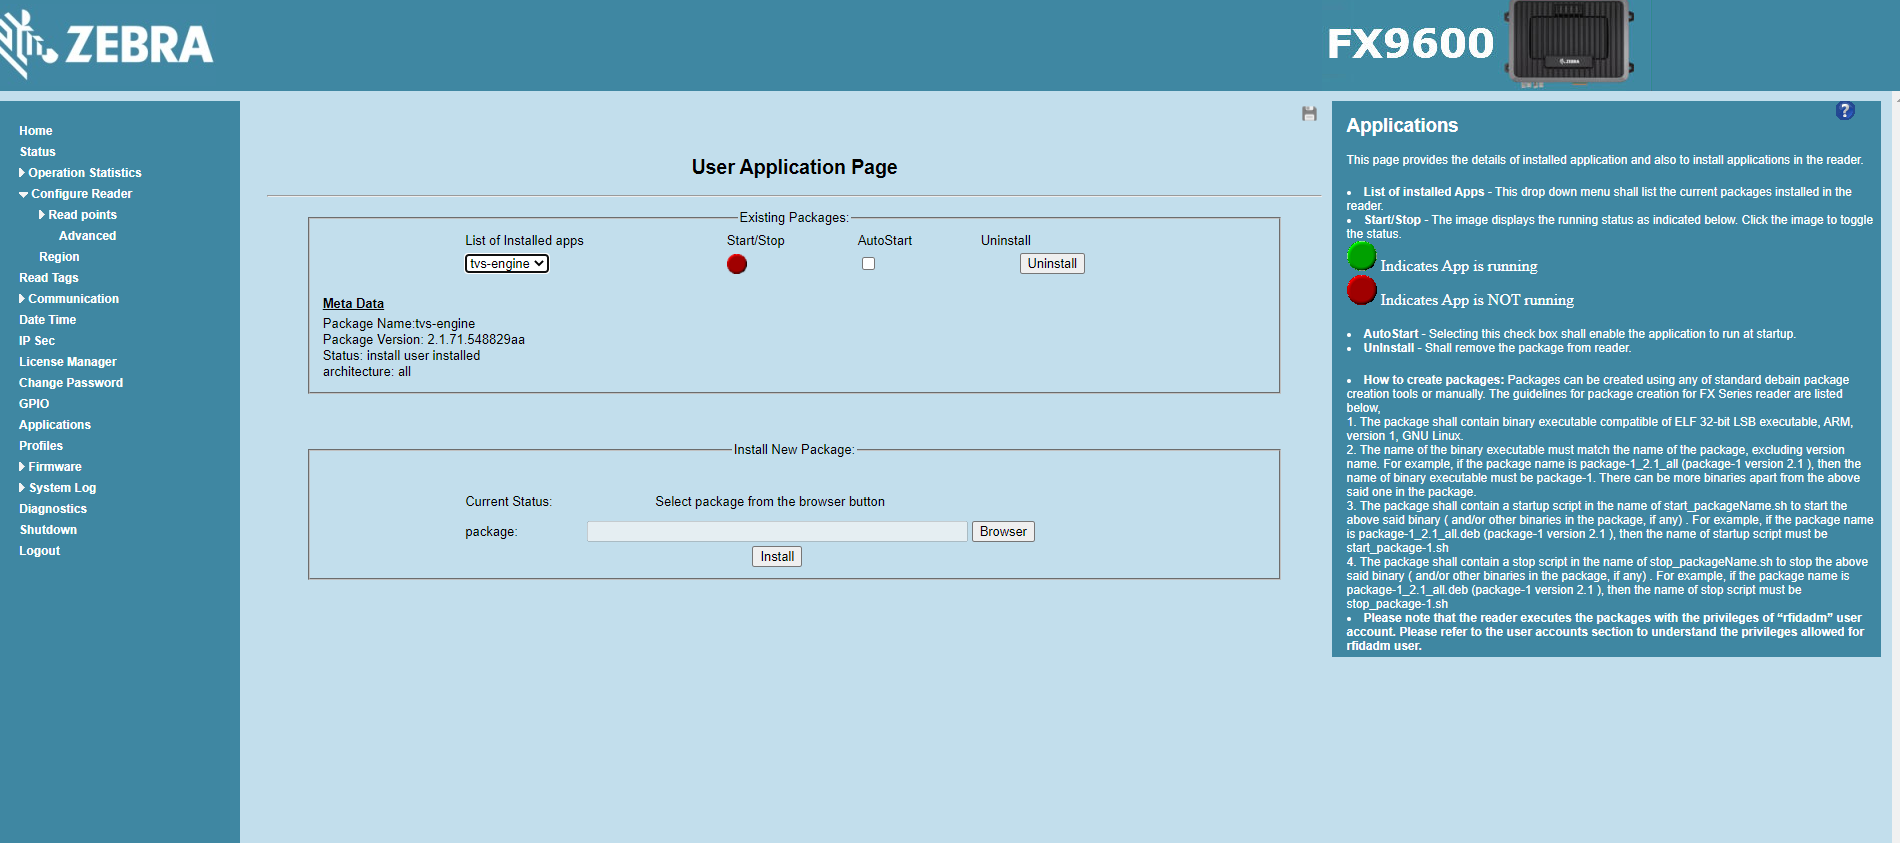

Check that TVS engine is running using browser to the HTTPD port of the engine, default ports are 8080 and 8081 or 8088 in latest versions.
With Impinj R700 (and R310, R510) readers the HTTPD PORT may need to configured to port 8088 (ports 8080-8085 may be blocked by firewall by default). This configuration may have to be done via the rshell using linux commands (such as editing reader.ini file using vi editor)
The default username is admin and default password is engine.
Setting up TVS Device Manager connection in the configurations will disable configuration from web page and allow changes only from Device Manager. Removing device manager address from the settings will enable web configuration.


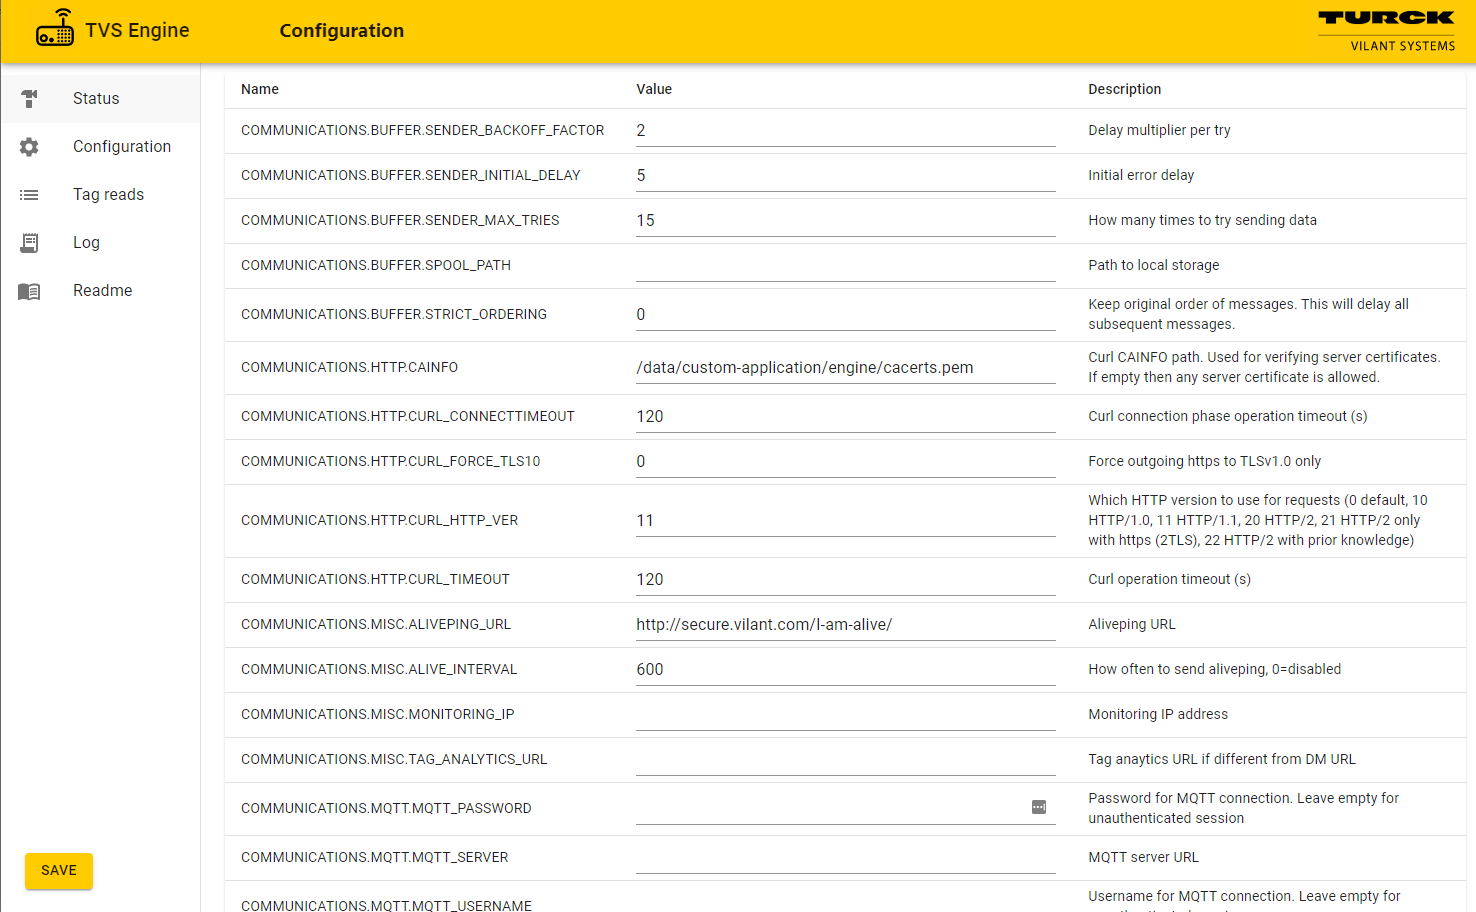
SEE ENGINE README FILE FOR DETAILS ABOUT CONFIGURATION
Connection to VVM Server
Example (replace server address and username password combination according to your server):
SERVER_URL =https://restclient:password1234@mydemo.tvsdemo.cloud/tvvm/rest/assets/operations/
Also make sure following settings are correctly:
RFID Settings are correct and reader is reading correctly
TAGFILTER setting is correct
BASIC_OPERATION = MOVE (or any other operation type supported by VVM suitable for the application, such as SEND/RECEIVE/CREATE…)
DEBUS_PASSTHRU_PORT = 0
GPI_TRIGGER = -1 (if no triggering is needed and reader should read constantly)
ANTENNA_ACTIONS contains correct locations for each antenna, for example: ANTENNA_ACTIONS = 1:GATE1,2:GATE1,3:GATE1,4:GATE1
ANTENNA_ACTIONS must match to existing location in VVM and location must be allowed for the restclient user in VVM user management

Where
DIRECTION=state,flush,MODE#[,readcount][,USERMEM][,NOEXTRA][,DEBUG]
* `state` milliseconds. Depends on mode.
* `flush` milliseconds. At any time in the process, if the tag is not seen
since ‘flush’ msec, it is removed from memory.
* `readcount` in MODE 3D how many reads is needed to advance to next zone. Default 0
* Zones come from ANTENNA\ACTIONS config parameter. For example tag reads from
antennas 1+2 are from zone “IN” and reads from antennas 3+4 from zone “OUT”
* `MODE1` (default) when the tag is not seen for ‘state’ msec, it is passed to
the next filter with the direction of the last zone.
* `MODE2` similar to MODE1. In addition, requires that first and last events come
from different antenna actions. Or else UNKNOWN direction will be reported.
* `MODE3` Once tag has entered the second zone, a timeout of ‘state’ msec starts.
At the end of the timeout, if the tag is still in the second zone, it is passed
to the next filter. If during the timeout, the tag comes back to the first zone,
the timeout is stopped and nothing happens until the tag comes back to the second
zone. After event has been sent the tag is still in waiting state and new
event can be sent if tag changes zone. If NOEXTRA is specified then this will
only sent single event per tag.
* `MODE3D` is similar to 3D client. Requires ‘readcount’ reads and ‘state’ ms
from single zone without crossreads. Event is sent after two distinct zones
are recognized. If NOEXTRA is specified then only single event will be sent.
* USERMEM keyword will singulate tags based on user memory instead of EPC.
Tag is dropped if user memory is missing.
* DEBUG will store extra internal debugging data